|
|
|||||||||
|
Help pages about ImageGrab
Download my other software,                                    
This page is better viewed in 1024x768.
Last update on Thursday, September 23, 2010
|
||||||||
|
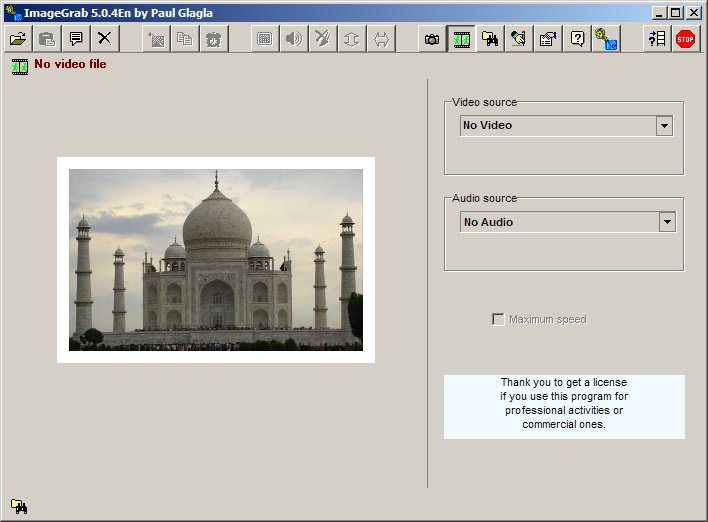
ImageGrab is delivered in a zip file containing two versions: the file ImageGrab_50en_setup.exe is an auto-executable file that will copy the application on a hard disk and create some shortcuts. The file ImageGrab_50en.exe is a version that needs no installation and can be launched directly. It becomes a portable version that can also be launched from a usb key or a Cd-Rom. When you launch it, ImageGrab, displays its main window, empty because no video has been loaded. Since the version 5.0.0 this windows may be resized or even maximized to cover the whole screen.
If you have not installed the filters Haali Media Splitter and FFdshow, two series of filters that can enhance dramatically the power of ImageGrab, then a warning will remind you that it is recommended to install them. If they have been found on your system, and sometimes you may have installed them without knowing it in a pack of codecs, then this panel is not displayed.
As mentioned, you may continue without installing the missing filters, and even check a checkbox to stop being warned. But I recommend rather to quit and install the filters with one of the methods indicated here. To open a video file,
use the first button You may also paste a video file that had been
copied to the clipboard with the button When the video loads in imageGrab it activates the navigation keys below the video screen.
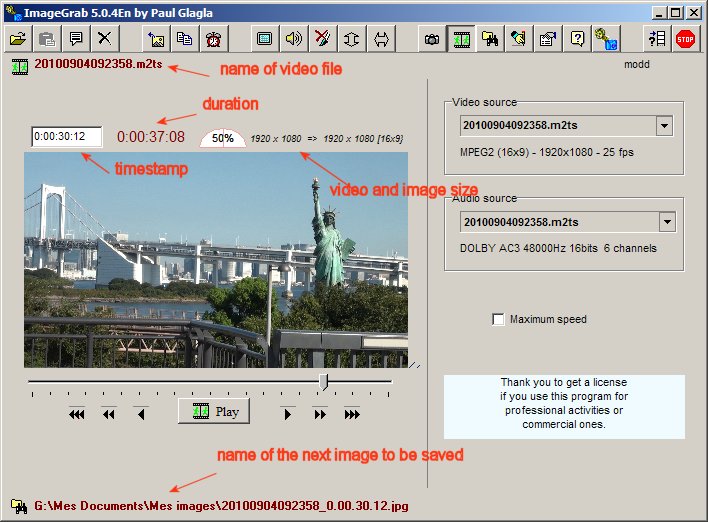
The current timestamp is displayed above the video image, with the duration of the video file and the size of the video image and the resulting size of the snapshot. The latter size is determined by the aspect ratio policy that has been chosen: normal size (type Alt+F5) is the default behavior that keeps the native size if there is no aspect ratio set in the source file, and uses that aspect ratio if it exists; Native (type Alt+F8) keeps always the native video size, 4x3 (type Alt+F6) or 16x9 (type Alt+F7) sets the aspect ratio independently of the native video size. On the picture above shot by my HD camcorder in Tokyo, the image is natively 16x9. The next picture will be saved with a filename
that is displayed on the bottom of the window. If you click
on the icon
When a video
is loaded in ImageGrab,
you have to choose the folder where the pictures will be
saved, and give them a filename and a picture format.. By clicking on the button Starting from top, you have first to choose a folder for saving the snapshots. Then you should decide if their filename will be build with a given root name, for example ImageGrab or if it will use the video filename. You may limit in that case the number of letters being used, for instance to 8. Then you must decide what will be added to the filename in order to identify each different image: either the current timestamp or a rank number increased on each new snapshot. You may precise in the second case how many digits should be used, and what should be the starting number. Finally, check if the saved images have to be in bmp format or in jpeg and what is the quality for jpeg. The greater the number, the better the quality, but also the bigger is the file. In my experience, 50 is a good compromise. Navigate then in the video, until you reach the frame to be grabbed. You can use the navigation buttons and the trackbar located below the video window. Generally, you can navigate with frame precision. It is also convenient to use the keys CTRL+arrow from the keyboard. You may also enter directly a timestamp position above the video, and type Enter to reach directly the position.
The Space
Bar operates
Play or Pause
on the video. You may mute
the sound of the video on and off by clicking
on the button
When the desired picture is displayed in the video, you may finally grab the image in different ways:
The snapshots will always be displayed in the small picture at the left or the right of the video window. (Toggle from right to left with ALT+W). The color of the image name at the bottom of the window, becomes green when the file has been saved.
More help pages for ImageGrab:
|
|||||||||
|
|
|
||||||||