
Warning:
This page has not yet been updated for DVDate 7.0.x and is only relvant for version 6.4.4


How to change the settings of DVdate
and make its behavior meet your needs
Download
DVdate:

Help pages about DVdate:


![]()
![]()
This page is better viewed in 1024x768.
Last update
on Saturday, April 19, 2008
The settings of DVdate
DVdate saves its settings in the Windows registry or into an ini file in order to find them at next start without having to set them again.
These settings are
shown and can be modified in the settings
panel, that you can open with the button
Settings
![]() or the key F10 or
by clicking on the Settings Command
in one of the menus. This panel features
several tabs: Preferences,
Shortcuts, Formats, Folders,
Inlay, Files.
or the key F10 or
by clicking on the Settings Command
in one of the menus. This panel features
several tabs: Preferences,
Shortcuts, Formats, Folders,
Inlay, Files.
Click on a zone of the picture below to goto to the relevant explanations:.

Select the tab Preferences, and look first to the Preferences group to see how the Settings are saved to the registry or to an ini file.
If you check Save the preferences when quit, (its' checked by default and recommended) then all settings are saved to the registry each time the application closes. All changes that occurred during a session are kept and you'll find them unchanged at next start. If the box is unchecked, then any changes made during the session will be discarded, and the settings will remain the same as at the start of the present session. When you quit DVdate, you will nevertheless be prompted to tell if you want to save them or not.
If you click on the button Save the preferences now you make an intermediate saving of the settings. This is only useful if Save the preferences when quit is not checked, since you would else save the settings on application close.
The button Delete the preferences erases all settings from the system. At next start, you will find only default settings. This button should also be used to clean the system before uninstalling DVdate.
You have two options:

Either the option Normal where the preferences are saved in the registry of Windows. It is the standard mode if you work on only one workstation. Either the option Portable where the preferences are saved into an ini file located in the same folder than DVdate. This option is useful if you launch DVdate from a usb key or an external drive. Thus DVdate can travel from one host computer to another taking all its preferences with it, and without leaving any trace.
If this box is checked, then all files added to the playlist will be automatically selected after being opened. If it isn't then only the last added file will be selected.
If this box is checked, then the menu Send To in Windows Explorer will contain a command DVdate. (shown in french on the picture below, sorry I have no English version of Windows).

By clicking on this command, DVdate is launched with the selected files already loaded in it. If among the selected files there is no AVI file, then DVdate will remain empty.
If this box is checked, then the playlist of DVdate will be saved as the default playlist when the application closes and will be reloaded at next start. It is only recommended if you have a big playlist and want to work on it during several sessions. Usually you would prefer to load manually playlists. The default playlist is a text file called playlist.txt and located in the default folder for playlists, as indicated in the Folders tab.
If this box is checked, then the video DV will be decompressed in half size before being displayed in preview. This avoids the deinterlacing issues and gives a better picture in the little video window of DVdate. But in fullscreen the video will seem less sharp. So if you show videos in full screen with DVdate, then uncheck this box, otherwise I recommend to check it.
In the menu Convert there is a command Recompress to DV type 2 (or CTRL+G) which compresses any non DV ( but AVI) file to a DV type 2. Indicate here if this command should create DVs in Pal or in NTSC. Let's remind you that Pal is 25 frames/second and image size 720x576, where NTSC is 29.97 frames/second and image size 720x480.
In the menu Convert there is a command Recompress to DV type 2 (or CTRL+G) which compresses any non DV ( but AVI) file to a DV type 2. Indicate here if this command should create DVs in frequency 32000, 44100 or 48000Hz. The three frequencies are allowed by the DV standard. If the original frequency is one them, I recommend not to change it.
DVdate can create two types of scn files, the first type (ANSI) was the most frequent. It writes the caption of scenes in 1 byte characters named ANSI. Some languages need nevertheless Unicode characters written with two bytes. That's why one can now find more and more scn files where the caption is written with two bytes characters. It's the second type. You may choose the relevant one for your language.
The shortcuts of DVdate
Under the tab Shortcuts you will find the complete list of commands of DVdate with their keyboard shortcuts, and eventually the character used as switch for the scripts and command-line execution.

It is convenient to keep this data at hand. To find easily a particular information, the list may be sorted either by command names or by shortcuts. Use the checkbox at the bottom.
The formats of DVdate
In DVdate, the timecode has always the format hh:mm:ss:ff (Hours:/Minutes:Seconds:Frames) but the datecode may have different formats. The tab Formats lets you set the formats of datecode in four different situations:

(1) The command Add datecode uses this format when adding the datecode to the filename. Indicate if the datecode (or the timecode in the command Add timecode) will be added before the name by checking the relevant box.
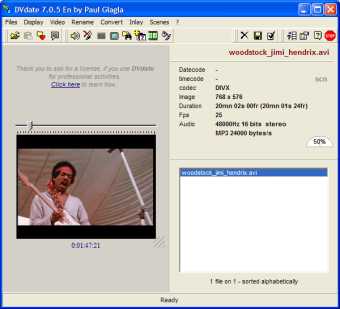
(2) DVdate uses this format when displaying the datecode in the information panel .
(3) The command Rename uses this format to rename a file à la Scenalyser.
In (4) you set the format of datecode when inlaying in the video or exporting in a subtitle file.
Generally you can indicate the format with the codes dd mm yy hh nn ss for day month year hour minute second in any order. You can include any other characters in quotes, or include only some of these elements. For instance the format 'Quebec, ' mm dd, yy will display the datecode as Quebec, 06 29, 03.
You can also set a longer date. I recommend anyway to use yyyy in order to get the complete year 2003 and not the short 03. If you put mmm you'll get the short 4 letters name of the month, and if you put mmmm you'll get the complete month name. With ddd you'll get also the short day of week, or with dddd the complete name of the day. But you must add d or dd to get also the number of the day. For example, dddd', the' dd 'the of 'mmmm will give Sunday, the 29th of June.
Finally , you may write the datecode in the short or long date format of Windows by using ddddd or dddddd to obtain respectively 2003/06/29 or Sunday, June 29, 2003. Similarly, write tt to get the time in default format.
If you want to use the command Rename to rename a file à la Scenalyser, you should set a root name here. DVdate proposes the default root name ClipDV_. Actually to stay really compatible with Scenalyser you should replace the underscore by a quote like ClipDV'. And you should not change the format yyyymmdd_hh.nn.ss if you want to get a Scenalyser-like name.
The folders of DVdate
Under the tab Folders you can set the default folders used by DVdate.

![]() Default folder for opening videos: this
folder is used by DVdate when you
launch the command
Files/Open.
The default folder is My
Documents. If your favorite videos are
in a folder My
Videos indicate it here and you will
open files directly from this folder.
Default folder for opening videos: this
folder is used by DVdate when you
launch the command
Files/Open.
The default folder is My
Documents. If your favorite videos are
in a folder My
Videos indicate it here and you will
open files directly from this folder.
![]() Preferred folder: it
is a special folder with fast opening features.
All AVI files from the preferred folder
and its sub-folders may be opened with
one hit on the key F7 or
one click on the button:
Preferred folder: it
is a special folder with fast opening features.
All AVI files from the preferred folder
and its sub-folders may be opened with
one hit on the key F7 or
one click on the button: ![]() . Set
here what you want as your preferred folder,
for instance the folder in which you save
the captured videos.
. Set
here what you want as your preferred folder,
for instance the folder in which you save
the captured videos.
![]() Default folder for the Playlists:
it is a folder in which DVdate saves
or loads the text files used for keeping
the playlists. This folder is used by the
commands Files/
open the playlist or
Save
the playlist as...
This folder sets also the location of the
default playlist. The default playlist is
a text file called playlist.txt that can
be loaded simply by Shift+F7. The
default playlist is also saved when DVdate
closes and reloaded at next start if the
box Save
the playlist when quit
is checked in the tab Preferences.
Default folder for the Playlists:
it is a folder in which DVdate saves
or loads the text files used for keeping
the playlists. This folder is used by the
commands Files/
open the playlist or
Save
the playlist as...
This folder sets also the location of the
default playlist. The default playlist is
a text file called playlist.txt that can
be loaded simply by Shift+F7. The
default playlist is also saved when DVdate
closes and reloaded at next start if the
box Save
the playlist when quit
is checked in the tab Preferences.
![]() Where to save the files created by conversion: the
commands of the menu Convert create
files that can either be located in the
same folder as the folder of the original
file, or - if the box Convert
into the same folder is
checked
- be saved in one fixed folder.
Where to save the files created by conversion: the
commands of the menu Convert create
files that can either be located in the
same folder as the folder of the original
file, or - if the box Convert
into the same folder is
checked
- be saved in one fixed folder.
In the menu Convert there is (if some conditions are Ok) a command Inlay which you may personalize in very sophisticated manners. Some of these parameters are also used when creating a subtitle file *.srt in the menu Scenes.

The button Font allows to choose the font of inlay, its color, its size and its style (Bold, Italic..). I recommend to keep the white color and to check the box Default size which lets DVdate choose the size of the inlay according to the size of the video, bypassing the size indicated with the button Font.
Border adds a black border to the inlayed text of a size that you may set. I use often 1 or 2 as border. It is a good way to have a text readable on every background.
Indicate also the Alignment of the two inlay lines, and if it's datecode or timecode that will be inlayed.
If you check automatic then the inlay will occur automatically at some events : either only one time when the inlay is launch (possibly at start of the video), either at each scene change, - defined by a discontinuity in the datecodes -, either at each new day. The duration of display in seconds must be set below. If the box is not checked, the inlay will be continuous on the whole video, as long as datecode or timecode is present in the current frame.
Under the header Time difference you may adjust the datecode by clicking on a little button. It displays a panel which may take two different appearances, depending on the box Advanced . If it is checked, then you may fix the datecode by any difference. If not (what I recommend) then you may only fix the datecode with an entire number of hours.
It is very useful, if like I do, you forget to change the clock of your camcorder when you travel abroad, or when the summer or winter time is introduced. In this case, the datecode written by the camcorder on the frames is not the real time when you recorded the video. Before incrusting it into the frames, you should fix it, to avoid seeming to have breakfast at 2 PM in Canada. Set the time difference to -6 and the breakfast will take place again at 8 AM.
As far as the format of the inlayed datecode is concerned, go to the tab Formats and modify the two fines of format..
The files for the third party's applications
In this panel you may select three applications to be launched with the keys F2, F3 or F4 with the selected avi files open in it.

The first file (F2)
is reserved for ImageGrab
that can extract very easily images from the selected video. Indicate
here the filename and path to the exe - file of ImageGrab. Click
on the icon ![]() and browse in the folders of your system until
you find the file for ImageGrab, for example
imagegrab41en.exe.
and browse in the folders of your system until
you find the file for ImageGrab, for example
imagegrab41en.exe.
The two others may be used freely for other applications, like GSpot.exe, if you want to compare the data given by DVdate with the data of this soft, or VirtualDub.exe if you want to recompress the avi files.
Remember that the key F5 has a similar behavior to open the selected video in the default player associated with avi files in Windows.